A new version of the Windows 10 IoT Core Insider Preview is now available for supported devices like the Raspberry Pi 2, MinnowBoard Max and Intel Galileo. The new 6/24 build includes a couple of new features like SSH support, audio output support for the Raspberry Pi 2 and also some bug fixes. Wi-Fi however is still not supported on any of the boards, so it's still up to the good ol' LAN cable.
You can read up on all the changes and fixes of this 6/24 build of Windows IoT Core Insider Preview in the official release notes
Ok, on to the real reason behind this article, i'm not only here to report all about this new release but alongside the 6/24 release, Microsoft has updated the installation instructions and it is now fairly simplified and user friendly compared to the original way which was the only way to install it on the previous two releases. Of course, the old way of flashing the image file through Command Prompt still works, but this new method is made for users which are not familiar with the command line.
Requirements
As expected, you will need a computer running Windows 10 (build 10069 above) to install the image and also a class 10 micro SD with at least 8GB of storage. In my experience, the installation was pretty quick, but the download of the ISO file heavily depends on your internet connection.Step 1: Downloading the ISO file
Just like before, you will need to register yourself as a Windows Insider and then only you will be given access to download the file. The new ISO file is 500MB big I would highly advise you to try downloading it through a browser other than Project Spartan (build 10130 and below) because in my experience, the browser crashes midway through the download.Yeah, you can download the ISO file here and read my original guide to learn how to register yourself as a Windows Insider.
Step 2: Installing the program
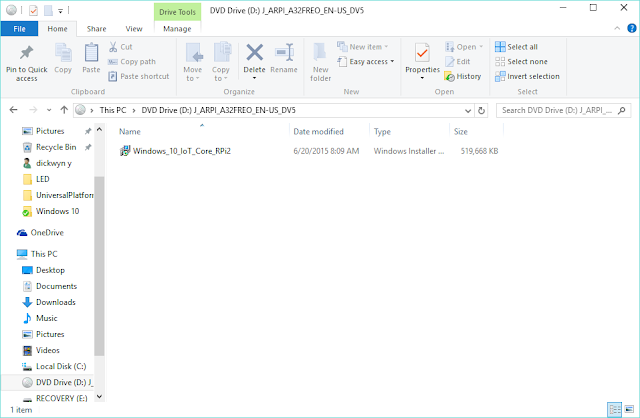
After the ISO file is downloaded, you can double click on it to mount it onto your computer and inside the ISO disk image you will see a .exe file and just double click on it and follow the installation steps. Once the installation is complete, all the files should reside in the C:\Program Files (x86)\Microsoft IoT folder.Make sure you unmount the ISO file by heading to the 'This PC' tab on the file explorer and right clicking on the ISO disk image and selecting eject.
Step 3: Flashing the image file
As I said earlier, the new installation method in this new build has been greatly simplified and all you have to do now is to locate a program called WindowsIoTImageHelper through Cortana (your start menu) and that program will help to flash the IoT Core image to your microSD card (make sure to plug it in).From the program, look for your SD/microSD card and select it. Next, you will need to select the flash.ffu file which is located in the C:\Program Files (x86)\Microsoft IoT\FFU\RaspberryPi2 directory. Just browse to that directory and select the file and then all you have to do now is to hit the 'Flash' button and you're done.
NOTE!: This is a crucial step; Once the image has been flashed, you MUST safely remove the SD/microSD card from your system. If you miss this step, the image file will be corrupted and when the OS will be stuck in a boot loop. I personally missed this step, so don't follow on my footsteps, safely remove the SD/microSD card.
Conclusion
Congratulations, you have flashed the latest version of Windows 10 IoT Core Insider Preview onto your microcontroller. The first boot up takes a little while (2-3 minutes) and once you're booted up, you will need to choose a default language and then you will be redirected to the new landing page.Surprisingly, this new 6/24 release features a lot of visual improvements and there's now even a Tutorial's tab which will let you compile sample code straight from the device itself without going through Visual Studio.


No comments :
Post a Comment